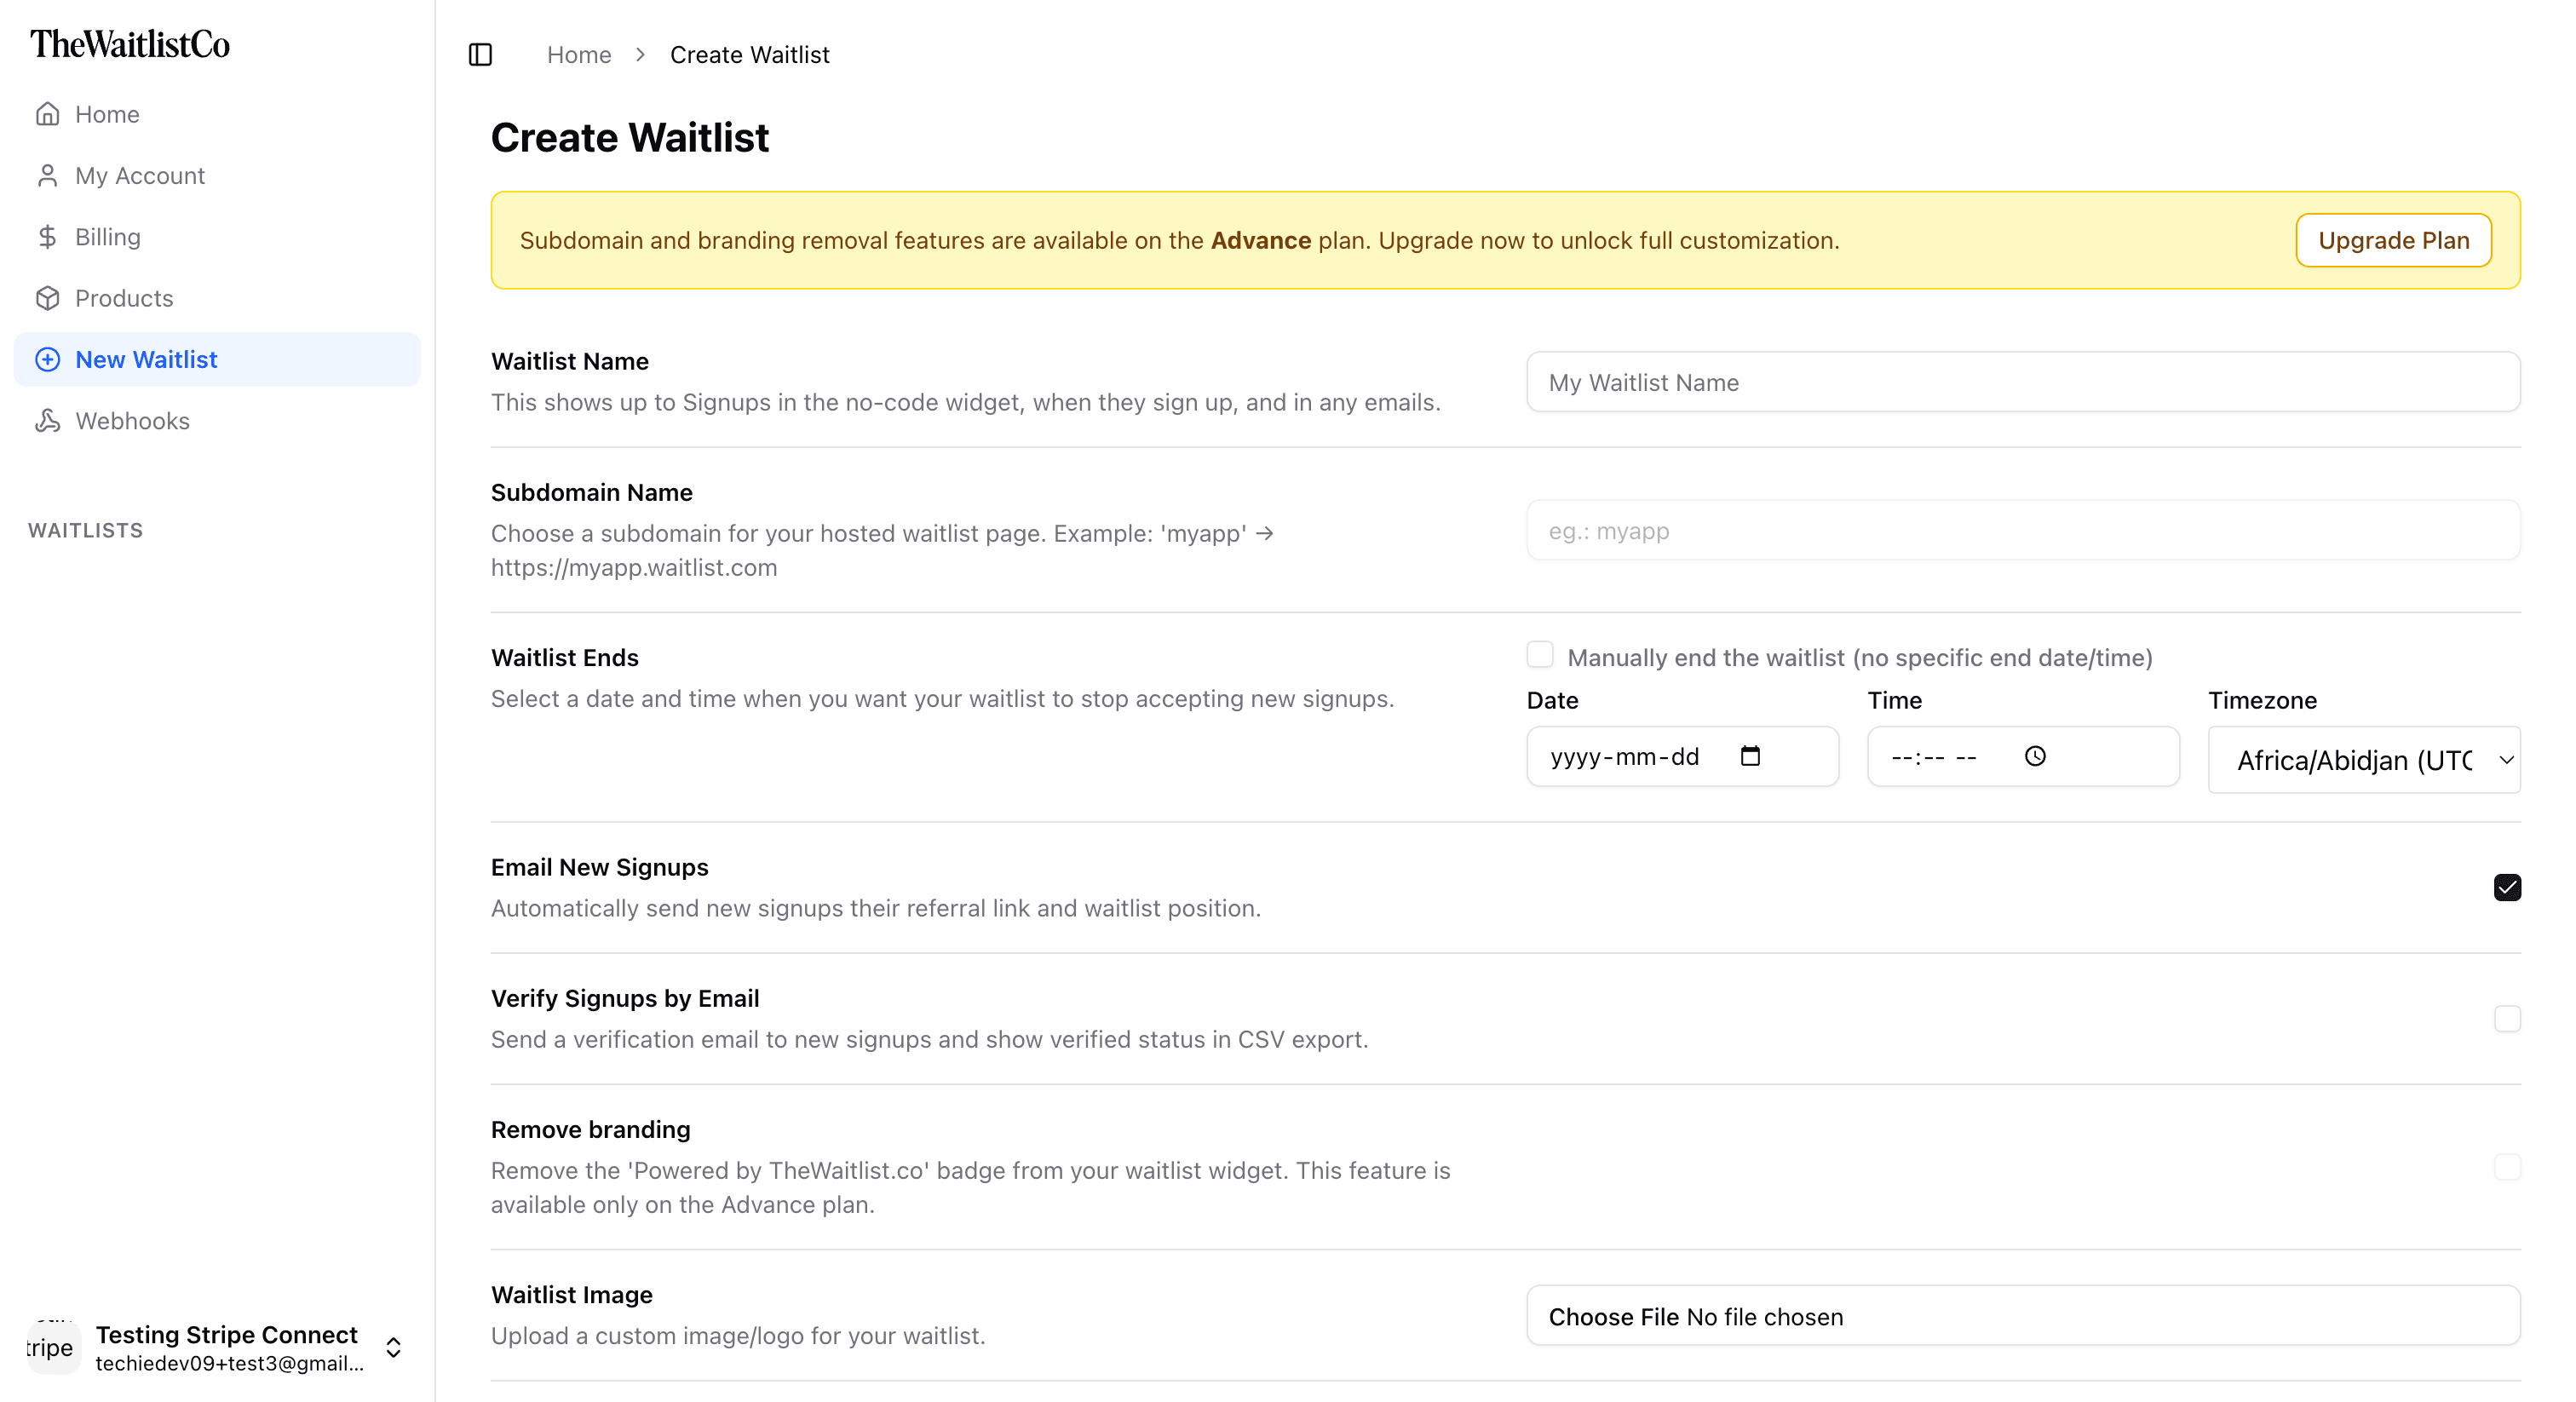
5️⃣ Create Your First Waitlist
Once you’re ready, it’s time to create your waitlist.
📝 Steps:
- Click New Waitlist in the dashboard.
- Fill in:
- Waitlist Name – Displayed in widgets and emails.
- Subdomain – Your hosted waitlist URL (e.g.,
myapp.waitlist.com). - Waitlist Ends – Set an end date/time or keep open-ended.
- Email New Signups – Auto-send referral info to new signups.
- Verify Signups by Email – Helps reduce spam.
- Remove Branding – Available in Growth plan.
- Waitlist Image – Upload logo or banner.
- Click Create to publish your waitlist.

Last updated on